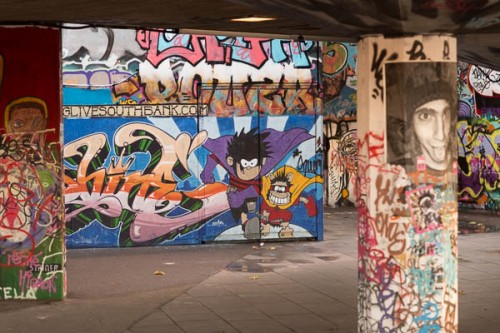
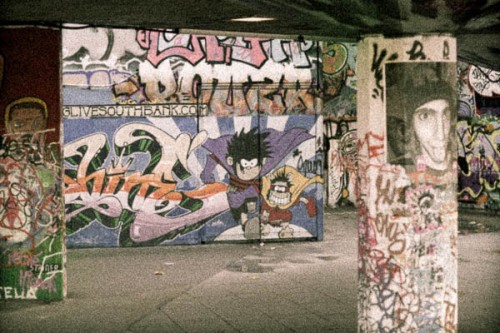
I wanted a quick way to get an Autochrome-like look to some images. My preferred method is to use a Lightroom preset as a starting point but I couldn’t find a downloadable preset that gave me the look I wanted. However Mark Abeln over at The Refracted Light did some interesting work analysing the colour gamut of autochromes. Using this as a basis I made my own preset. Although Lightroom Develop adjustments don’t allow an exact replication of the gamut, it’s the effect I’m after, not scientific accuracy. Apart from the colours, Autochromes are noticeably grainy. The Lightroom control for this will need adjusting depending on the resolution of your original and the size of your reproduction. You can download my preset from my Web site. Unzip the file autochrome.lrtemplate and save it to (on Windows) [username]/AppData/roaming/adobe/lightroom/develop presets/user presets/
Search this blog
-
Recent Posts
- Deutsche Borse Photography Foundation Prize 2022 2022/03/29
- Using 35mm film in Hasselblad V Series, Mamiya RB67 (and other cameras too) 2021/03/17
- Impressions from the Contemporary Artists’ Book Conference 2021 2021/03/07
- Shape of Light at Tate Modern, London 2018/07/21
- Awoiska van der Molen: Sequester 2017/03/05
- Wolfgang Tillmans: 2017, a world of fascination 2017/02/19
- Christopher Thomas: New York Sleeps 2016/04/13
- Thomas Mailaender’s Gone Fishing 2016/04/11
- Masahisa Fukase: solitude or loneliness? 2016/03/22
- Charles Petillon: Invasions 2016/03/22
Top Posts & Pages
Subject categories
Archives
- March 2022
- March 2021
- July 2018
- March 2017
- February 2017
- April 2016
- March 2016
- November 2015
- August 2015
- June 2015
- May 2015
- March 2015
- February 2015
- November 2014
- September 2014
- August 2014
- July 2014
- June 2014
- May 2014
- April 2014
- March 2014
- February 2014
- January 2014
- December 2013
- November 2013
- October 2013
- September 2013
- August 2013
- July 2013
- June 2013
- May 2013
- April 2013
- March 2013
- February 2013
- November 2012
- October 2012
- August 2012
- June 2012
- May 2012
- April 2012
- January 2012
- December 2011
- November 2011
- July 2011
- June 2011
- May 2011
- March 2011
- February 2011
- January 2011
- October 2010
- August 2010
- July 2010
- May 2010
- April 2010
- March 2010
-
Follow on Feedly

Follow me on Twitter
My Tweets


Thank you for this template.
I actually tryed to use for a shooting i did during a short reconstitution of the first world war (people in costumes in a cave, in a field…).
To my mind this is a little to grainy for a portrait, but it’s easy to play with the settings and way easyer than the photoshop tutoriels i found.. even though i’d like to try and see the results whith photoshop…
ps: sorry for the mistakes, english is not my native language.